Knurl vs Spline: Quelle est la différence ?
When you look at mechanical parts, you might notice patterns or teeth on some of them. These are often knurls or splines. At first, they can look similar, but they are used for very different purposes.
In this blog, we’ll break down the topic of knurl vs spline. You’ll learn what each one is, how they’re made, where they’re used, and how they compare.
What is Knurl?
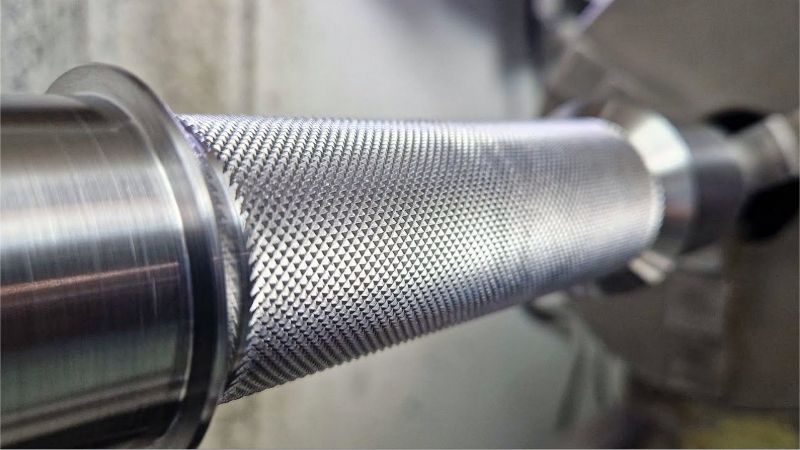
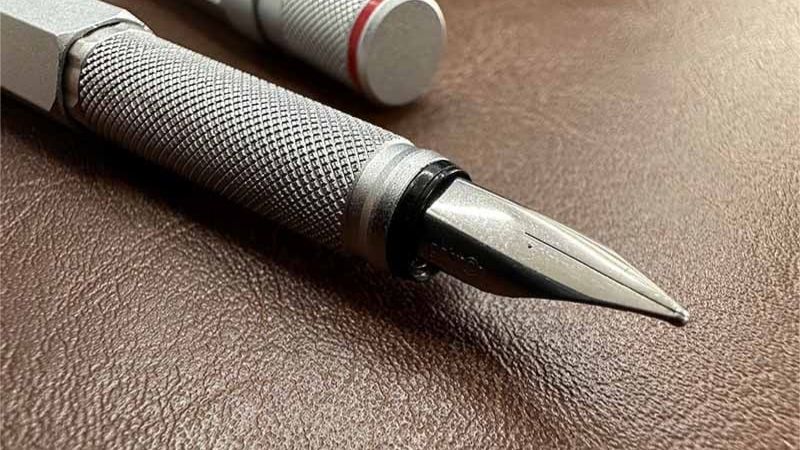
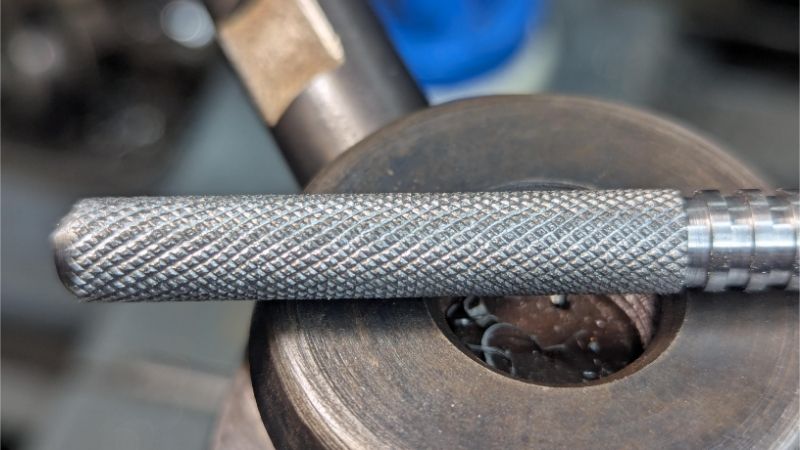
Knurling is a process used to add a pattern to a metal surface. It usually looks like small raised diamonds or straight lines.
You’ll often see knurling on tools or machine parts. It helps make the surface easier to grip, especially when you need to turn or hold something tightly.
Features of Knurling
Knurling has some key features that help you understand how it works and why it’s useful. Here’s what you need to know:
Texture Patterns
Diamond Pattern: This is the most common. It has crisscross lines that make small diamond shapes. It gives you a strong grip in all directions.
Straight Pattern: This has lines that go straight across, either up and down or side to side. It gives a good grip in one direction.
Hybrid Pattern: This mixes both diamond and straight patterns. It gives decent grip and also looks nice.
Depth and Pitch
Depth means how deep the pattern goes into the surface. Deeper knurling gives a stronger grip but can be rough on your hands or gloves.
Pitch is the space between the raised lines. A fine pitch has tiny details, while a coarse pitch has bigger, more noticeable patterns.
Compatibilité des matériaux
Metals like steel, aluminum, and brass are the most common. Plastics can also be knurled, but the method may be different. Wood can be knurled, too, but it needs special tools.
Durabilité
Knurled surfaces last a long time. When done on hard metals, they can take a lot of wear and still keep their grip.
Esthétique
Knurling doesn’t just help with grip, as it also looks clean and professional. The patterns can make tools or parts look high-quality and well-made.
Applications of Knurling
You’ll find moletage in many tools and machines where grip and control are important, such as the following:
Hand Tools
- Screwdriver handles
- Pliers
- Wrenches
- Hammers
Fitness Equipment
- Barbell and dumbbell handles
- Pull-up bars
- Gym rings
Instruments de musique
- Guitar tuning pegs
- Drum rods
- Trumpet valve caps
Instruments de précision
- Microscope knobs
- Camera focus rings
- Dial indicators
- Micrometers
Composants automobiles
- Pedals
- Gear shifters
- Air conditioning knobs
- Some tire treads (larger scale version)
Électronique grand public
- Volume knobs
- Headphone wheels
- Battery covers
Machines industrielles
- Control levers
- Adjustment wheels
- Safety handles
How to Create Knurling
Below are the basic steps you can follow to make knurling. This is usually done using a lathe or a milling machine.
- First, choose the right knurling tool and pattern for your part. Then, make sure your workpiece is held tightly in the machine so it doesn’t move.
- Place the knurling tool straight (at a 90° angle) to the surface of your part. Set the right depth so you get the texture you want.
- Carefully move the tool into the spinning part. Apply steady pressure so the pattern forms properly. Don’t rush, let the tool do the work.
- Keep the tool in contact until the whole area is covered with the pattern. If you’re cutting the knurl instead of rolling it, you may need to go over it a few times to get the right depth.
- Once you’re done, check the pattern to make sure it looks even. Clean the part to remove any metal chips or oil before using it.
Knurling Process: Rolling vs. Cutting
These are the two main ways to create knurling:
Rolling (Also called Forming)
How it works: Hard wheels press into the surface and push the metal into shape.
Best for: Soft metals like aluminum, brass, and copper.
Avantages : It’s fast, about 5–20 seconds, doesn’t make chips, and wastes little material.
Inconvénients : it can make the part slightly bigger, and your setup needs to be strong and steady.
Découpage
How it works: A sharp tool or two wheels cut the pattern directly into the material.
Best for: Harder materials like steel, stainless steel, and other tough alloys.
Avantages : It gives you a cleaner, more accurate pattern and doesn’t change the size of your part.
Inconvénients : It’s slower, about 20–45 seconds, and the tool can wear out faster.
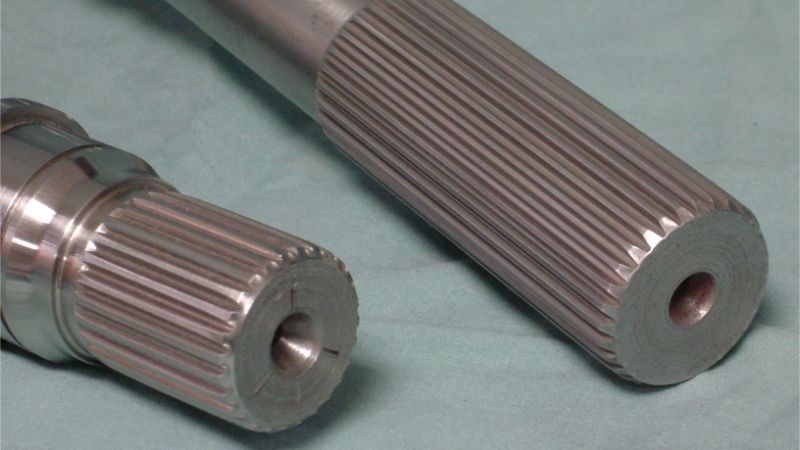
What is Spline?
A spline is a part you use to connect two rotating components so they can turn together and transfer twisting force, which is called torque.
It has teeth or ridges that fit into matching grooves on the other part. This gives you a strong connection that won’t slip, even under heavy loads.
Features of Splines

Splines have special features, and these are the following:
Tooth Geometry
Splines come with different types of teeth.
Involute splines have curved teeth that help center the parts when they fit together. They also have a large contact area, which makes them great for handling high loads. You’ll often use these in things like car gearboxes and turbines.
Straight-sided splines have flat, straight teeth that are easier to machine. They don’t spread the load as well as involute splines, but they work well in simple systems like farm equipment or basic couplings.
Serrated splines have small, shallow teeth that are close together. These are made for lighter jobs and smaller shafts. You’ll usually find them in electronics or small consumer devices.
Helical splines have teeth that are cut at an angle along the shaft. This design allows smoother movement and better torque transfer. You might use these in robotics or fast-moving power tools.
Fit Types
You can choose how tightly the spline fits with the other part. Clearance fit gives you space between parts, so it’s easy to put together and take apart. Transition fit is a balance because it is not too loose and not too tight. Interference fit is very tight, and you may need heat or pressure to put the parts together.
Number of Teeth
The number of teeth depends on what you need. Fewer teeth, like 4–12, are good when you’re dealing with high torque and slow speeds. More teeth (20 or more) help things run smoother and spread the load more evenly.
Length
Short splines are compact and good for low-torque jobs. Long splines can handle more load and allow for more movement along the shaft.
Material Choices
Metals like steel and aluminium are the most common. Plastics work well when you don’t need a lot of strength or want less noise. Composites are newer and used for special designs or light weight.
Stress Distribution
Splines are built to spread the force evenly across the teeth. This helps reduce wear and makes the connection stronger and longer-lasting.
Axial Movement
Unlike solid couplings, splines let one part slide a little along the other. This is helpful when parts need to move or adjust during use:
Applications of Splines
Here are some common places where you might see or use splines:
Industrie automobile
- Transmission systems
- Driveshafts
- Steering columns
- Differential gears
Aérospatiale
- Turbine engines
- Flight control systems
- Train d'atterrissage
- Propeller hubs
Machines industrielles
- Boîtes de vitesses
- Conveyor systems
- Pumps and compressors
- Spindles on machine tools
Production d'électricité
- Wind turbine drives
- Hydroelectric shafts
- Steam turbine couplings
- Generator parts
Matériel agricole
- Tractor PTO (power take-off) shafts
- Harvester drives
- Irrigation pump connections
Applications marines
- Propeller shafts
- Outboard motors
- Steering systems
- Winches
Produits de consommation
- Outils électriques
- Bicycle parts
- Adjustable furniture mechanisms
How to Create Splines

These are a few important steps and things you need to think about when creating splines:
Manufacturing Methods
You can machine splines using methods like fraisage, broachingou hobbing. Another option is forming, which includes processes like cold rolling and extrusion. Splines can also be made through casting, such as investment casting or die casting.
Considérations relatives à la conception
Load Requirements: Figure out how much torque (twisting force) the spline needs to handle.
Operating Conditions: Think about speed, temperature, and the environment the part will be in.
Material Choice: Use a material that works well with your chosen process and can handle the job.
Tooth Profile: Choose the tight tooth shape based on how it needs to perform.
Fit Tolerance: Decide how tightly or loosely the spline should fit with its matching part.
Spline Calculations
One important factor is the pressure angle, which affects how the teeth handle the load and how much they rub against each other. You also need to calculate the pitch diameter, which gives you the basic size of the spline.
The major and minor diameters will tell you how tall the teeth are and how wide the root is. Tooth thickness is also important because it affects how strong and wear-resistant the spline will be.
Contrôle de la qualité
You can use precision tools to measure its shape and size. Gear rolling tests help you see how smoothly it works when in use. To find any hidden cracks or flaws, you can use non-destructive tests like magnetic particle inspection.
Traitement thermique
Case hardening makes the surface hard while keeping the core tough. Through hardening strengthens the entire part. Stress relief is used to reduce internal stress that builds up during the manufacturing process.
Knurl vs Spline: Key Differences and Contrast
Here’s a quick table to help you understand the difference between knurl vs spline:
| Fonctionnalité | Knurl | Spline |
| Main Use | Helps you grip something better | Lets two parts spin together by locking them in place |
| Geometry | Raised diamond or straight lines on the surface | Straight ridges or teeth that run along the part |
| Load Handling | Not made to carry heavy loads; just for grip | Can handle high torque (twisting force) |
| How it’s Made | Patterns are pressed or cut into the surface | Made by machining, forming, or casting |
| Precision Needed | Doesn’t need to be super exact | Needs to be very precise to work right |
| Applications | On tool handles, knobs, and grips | In engines, gearboxes, and other rotating systems |
| How it Works | Grips by creating friction with your hand or surface | Connects tightly by fitting into matching grooves or teeth |
| Custom Options | Easy to change the pattern design | Usually follows set industry standards |
| Maintenance | Just clean it once in a while | Needs oil and proper alignment to avoid damage |
| Safety Notes | Might scratch your hand if you’re not careful | Can break or fail if not designed or maintained properly |
Conclusion
To sum it up, if you want a better grip on a handle or knob, go with knurling. But if you need to connect two parts so they spin together and handle a lot of torque, then splines are a better choice.
At DEK, we can help you create high-quality parts that match your exact needs. Whether it’s grip or torque, we’ve got the tools and expertise to support your project from start to finish. Contact us today et obtenir un devis gratuit.
