ABS Acetone Smoothing: Что нужно знать
You might notice the visible layer lines on your ABS parts. While these lines are normal, they can make your print look less polished. That’s where ABS acetone smoothing comes in.
In this blog, you’ll learn what ABS smoothing with acetone is, why it’s useful, and how to do it safely and effectively.
What is ABS Acetone Smoothing?
ABS Acetone Smoothing is a method used to improve the look of your ABS 3D prints. It removes the visible layer lines by melting them with acetone. The process involves exposing your ABS prints to acetone vapors, which causes the layers to blend together. This gives your print a smooth, glossy finish without any lines.
Why Should You Acetone Smooth Your ABS Prints?
Here are the main reasons why you should consider using acetone on your ABS 3D prints:
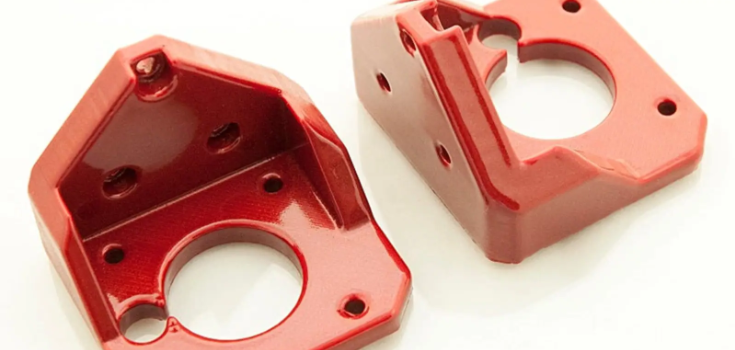
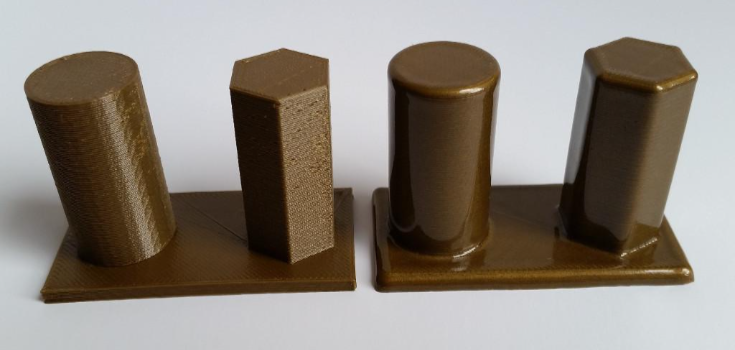
Get a Shiny Finish
Acetone smoothing makes your print go from dull and rough to shiny and smooth. It gives your print a glossy, professional look.
This is great for things like models, figures, or decorations. If you have already used the right color filament, you probably won’t even need to paint it.
Remove Layer Lines and Bumps
When you 3D print something, you usually see lines between layers, especially if the layer height is large or the design has curves. Acetone helps smooth those lines.
It works by melting the outer surface and filling in the gaps. Your print ends up looking more like it was made with a mold, not a printer. This also helps if you’re making things like vases or boxes, where leaks could be a problem.
Make Your Print Stronger
Acetone smoothing doesn’t just make things look better, it can also make them stronger. It gets rid of small gaps between layers that can cause weak spots.
Usually, 3D-printed parts are weaker in the vertical (z-axis) direction. Acetone helps the layers bond better in that direction, which can be useful if the part needs to hold weight or pressure from above. Just keep in mind that the surface will be a little soft for a while and may take a few weeks to fully harden again.
Materials and Equipment Needed
Below are the items you can use:
Type of Acetone
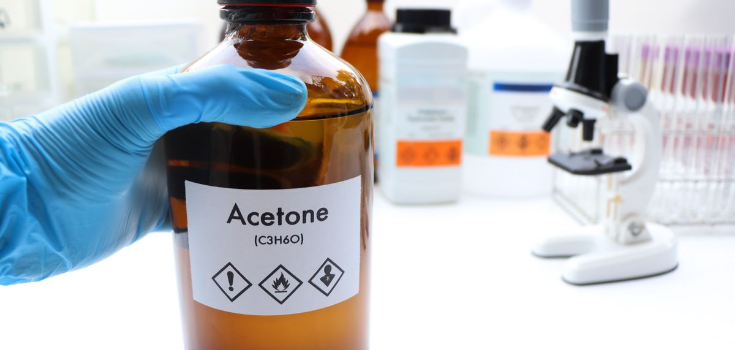
Go for acetone that’s 99% pure or higher. This kind is clean and doesn’t have water or other stuff that can mess up your prints. If the acetone has impurities or moisture, it can give you uneven results or even ruin your 3D prints.
Safety Equipment
- Safety glasses or goggles
- Respiratory or mask
- Chemical-resistant gloves
- Long sleeves
- Good ventilation
- Fire extinguisher
- Safety shower and eye wash station
Brushes, Containers, and Other Tools
- Transparent container
- Lid, base, or plate to seal the container
- Brush
- Aluminum foil
- Paper towels or tissues soaked in acetone
Process of ABS Acetone Smoothing
Follow these four simple steps to do the acetone smoothing process on your ABS components:
Prepare the ABS Part
Start with a clean, dry ABS print. Use a plastic file to smooth out rough spots that acetone won’t fix. Don’t use files that touched other materials because they might mess up the finish.
You don’t need to file the whole part, just the bumpy areas. Skipping this step can leave the surface uneven.
Apply Acetone
You can smooth ABS using two main methods: brushing or a vapor bath.
Method 1: Brushing
Pour a small amount of acetone into a shallow container. Use a paintbrush to lightly spread it on the surface. Use a small brush for details and a flat one for large areas. Let the part dry after brushing.
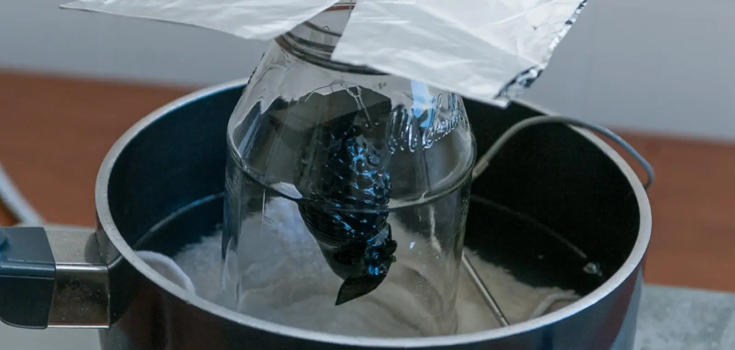
Method 2: Vapor Bath
Use a container that is not airtight, like a jar or plastic box with a loose lid. Place a metal platform inside to hold your print above the bottom. Soak paper towels in acetone and stick them to the container walls.
Lightly cover the container to trap the fumes; poke small holes in the lid. Let the vapors smooth the print for 10-60 minutes. Watch the process. When done, open the box and throw away the paper towels safely.
This gives an even, glossy finish without touching the part.
Watch and Control the Process
Set a timer and let the acetone fumes do the work. Time needed depends on the part’s size, usually 10 minutes to 2 hours. Check the part every few minutes to avoid over-smoothing.
Using a clear box helps you see the progress. You can add a little heat or a small fan to speed things up, but be careful because acetone is flammable.
Finishing Touches
Work in a well-ventilated area. Carefully open the container without letting the paper towels touch the part. Don’t touch the part right away; it’s still soft and easy to damage. Let it dry in a safe spot. This could take a few hours or even a few days.
After it hardens:
Check the finish. If it looks good, you’re done. You can sand it for a matte look or paint it if you want. If needed, repeat the smoothing process for rough spots.
If you used a hanger, the small hole it leaves is easy to fix. Use a filler, sand it, then paint.
Safety Precautions During ABS Acetone Smoothing
Follow these safety tips to protect yourself:
- Acetone is highly flammable. Don’t use it near flames or sparks. Store it in a cool, well-ventilated area, away from heat and sunlight.
- Prolonged exposure can cause headaches, dizziness, nausea, confusion, and skin irritation.
- Wear gloves and goggles when handling acetone to protect your skin and eyes.
- Use high-quality ABS filament from trusted brands. Cheap filaments may not react well to acetone.
- Keep acetone in a tightly sealed container, away from heat sources. For disposal, use a metal container with a plastic bag, and take it to a hazardous waste facility.
Pros and Cons of Acetone Smoothing Techniques
There are several techniques you can use to do acetone smoothing, and here they are:
Brushing with Liquid Acetone
Dip a fine brush into liquid acetone and gently apply it directly to the ABS part with light strokes to avoid uneven surfaces.
Плюсы: Great for precise work and detailed areas.
Конс: Time-consuming, may cause uneven smoothing, and could damage thin parts.
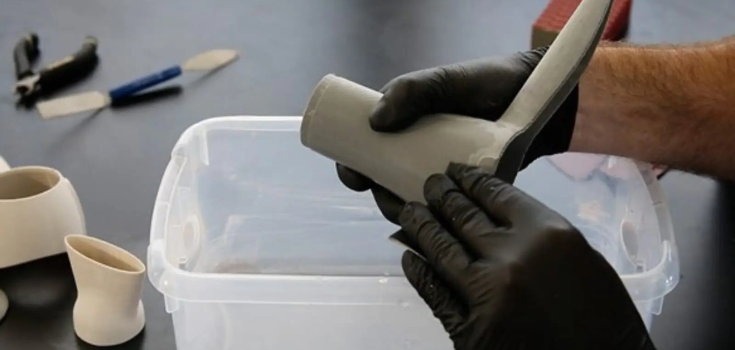
Acetone Vapor Bath
This method is considered the safest and most effective for smoothing ABS parts. It uses acetone vapors, not direct liquid contact.
Put the ABS part in a sealed container with acetone-soaked materials at the bottom. Make sure the part doesn’t touch the liquid. The vapors will smooth the surface.
Плюсы: Provides even smoothing, low risk of warping, and controlled exposure.
Конс: Needs careful setup and good ventilation to avoid vapor buildup.
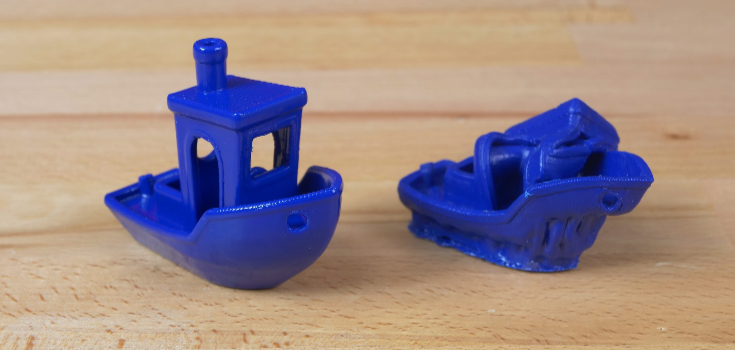
Acetone Bath (Not Recommended)
Submerging the ABS part in liquid acetone isn’t recommended because it has a high risk of over-dissolving, warping, or twisting. It also uses a lot of acetone, which can be wasteful.
Use the vapor bath for safer, more controlled results.
Wet Sanding with Acetone
Wet sanding with acetone can help, but it’s less common; you use fine-grit sandpaper dipped in acetone to smooth the surface manually. This usually works best with other techniques.
Плюсы: Allows for hands-on control and helps with initial smoothing.
Конс: Labor-intensive and requires careful handling to avoid over-sanding.
Tips and Best Practices for ABS Acetone Smoothing
Here are some tips to get the best results when ABS smoothing with acetone:
- Be patient and check your print often. Too much acetone can over-smooth your part and lose fine details. Stop when you get the smooth finish you want.
- Make sure the acetone is evenly spread on the surface. Try different methods and acetone amounts to find what works best for your print. Let the part dry fully in a well-ventilated space to get a smooth finish.
- For small parts with details, use less acetone and shorter exposure times. Larger parts need more acetone and longer exposure. Keep in mind that vertical surfaces smooth faster than horizontal ones.
- Try test prints to figure out the right settings for your different prints.
Smoothing ABS in Other Ways
If you prefer a method that doesn’t use chemicals, here are some options you can try instead of acetone smoothing:
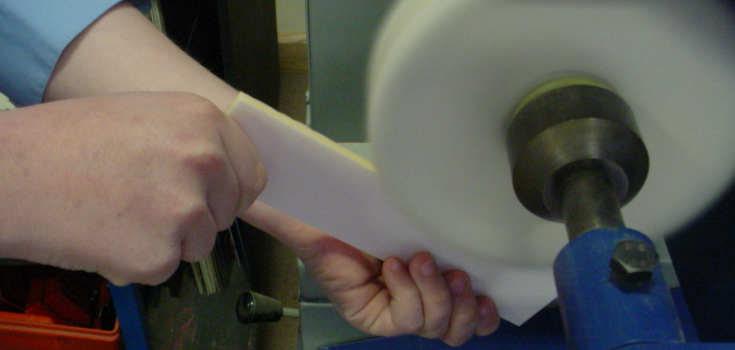
Шлифовка
Sanding is the most common way to smooth 3D printed parts, and it doesn’t need chemicals. You just rub sandpaper on the part, which removes a small amount of material from the surface.
To sand ABS parts, start with coarse sandpaper (like 80-grit), then move to finer sandpaper (120 and 240-grit). Finish with very fine sandpaper (1000-grit) and use water to make the part as smooth as possible. Try to cover the whole surface evenly.
Powered sanders can speed things up, but the heat they create can damage the part. If you have time, sanding by hand is a good choice. Sanding is easy and safe, but it can be hard to reach deep crevices and apply even pressure over the whole surface.
Полировка
If you don’t want to use a strong solvent like acetone, you can get a shiny finish by using a liquid polish and a cloth. Do this after sanding, once the surface is smooth
Apply the polish on the cloth and rub it in circular motions over the surface until it looks glossy.
Покрытие
Instead of removing material, you can cover the ABS part with a liquid coating that dries to create a smooth shell. This hides layer lines and blemishes without removing any material.
The thickness of the coating affects how smooth the part looks. A thin coat might not hide the layer lines, especially if the part has thick layers. Thick coatings can also change the size of the part, which may be an issue if the part has tight-fitting parts.
Methods to Avoid
Some methods that work for other materials won’t work for ABS. For example, isopropyl alcohol (IPA) can smooth PVB but doesn’t affect ABS. D-limonene works for HIPS parts but not ABS. Strong chemicals like chloroform should also be avoided, since acetone is safer and just as effective.
Heat-based methods to melt the surface don’t work well with ABS because it needs high heat, and it’s hard to cover the surface evenly. A hairdryer or heat gun works well for PLA, though, since PLA melts at lower temperatures.
Заключение
ABS acetone smoothing is a great way to enhance the appearance and strength of your 3D prints. By using acetone vapors, you can achieve a smooth, glossy finish and eliminate visible layer lines. Regardless of the method you choose, it’s important to follow safety precautions and work in a well-ventilated area.
